How to Fork Ethereum Mainnet with Hardhat and Impersonate Accounts on Mainnet.


Here is a guide to fork mainnet using hardhat, how to impersonate accounts with hardhat, simulating the the same state as mainnet, but it will work as a local development network. That way you can interact with deployed protocols and test complex interactions locally. In this article, you will learn to fork mainnet and also impersonate account.
Let's get started

What is Hardhat Forking?
Hardhat is a development environment for Ethereum software. It consists of different components for editing, compiling, debugging and deploying your smart contracts and dApps, all of which work together to create a complete development environment.
Hardhat forking is creating a local replica of an existing blockchain (like Ethereum's mainnet) for development purposes. This allows smart contract developers to:
Test and debug contracts against a real-world state without affecting the actual blockchain.
Interact with existing contracts deployed on the mainnet in a safe environment.
It's like creating a "practice" version of the mainnet for testing and experimentation.
Why do we Fork Mainnet?
It's used to interact with contract deployed on the mainnet
Used for impersonation of accounts. etc
Tools needed for Mainnet Forking?
Hardhat
Command Line Interface (CLI)
Remote Procedure Call (RPC) node (It can be gotten from either Alchemy, QuickNode, Ankr etc).
Set Up Hardhat Project
We will start by installing node, create a folder, install hardhat package and other items we would need.
Install Node and npm
In your cli, create a new folder
mkdir mainnet-hardhat-forking
we move into the folder
cd mainnet-hardhat-forking
We initialise npm in the created project folder, we proceed to install Hardhat and dotenv package using npm in the terminal:
we use dotenv package to manage our env files (environmental variables).
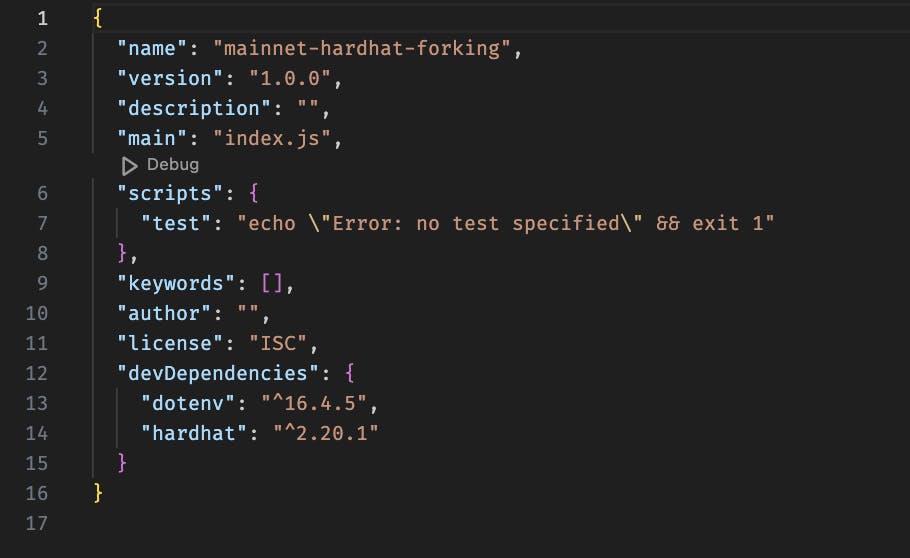
npm init --y && npm install --save-dev hardhat && npm i --save-dev dotenv
After running the the commands above, your package.json file you be like this.
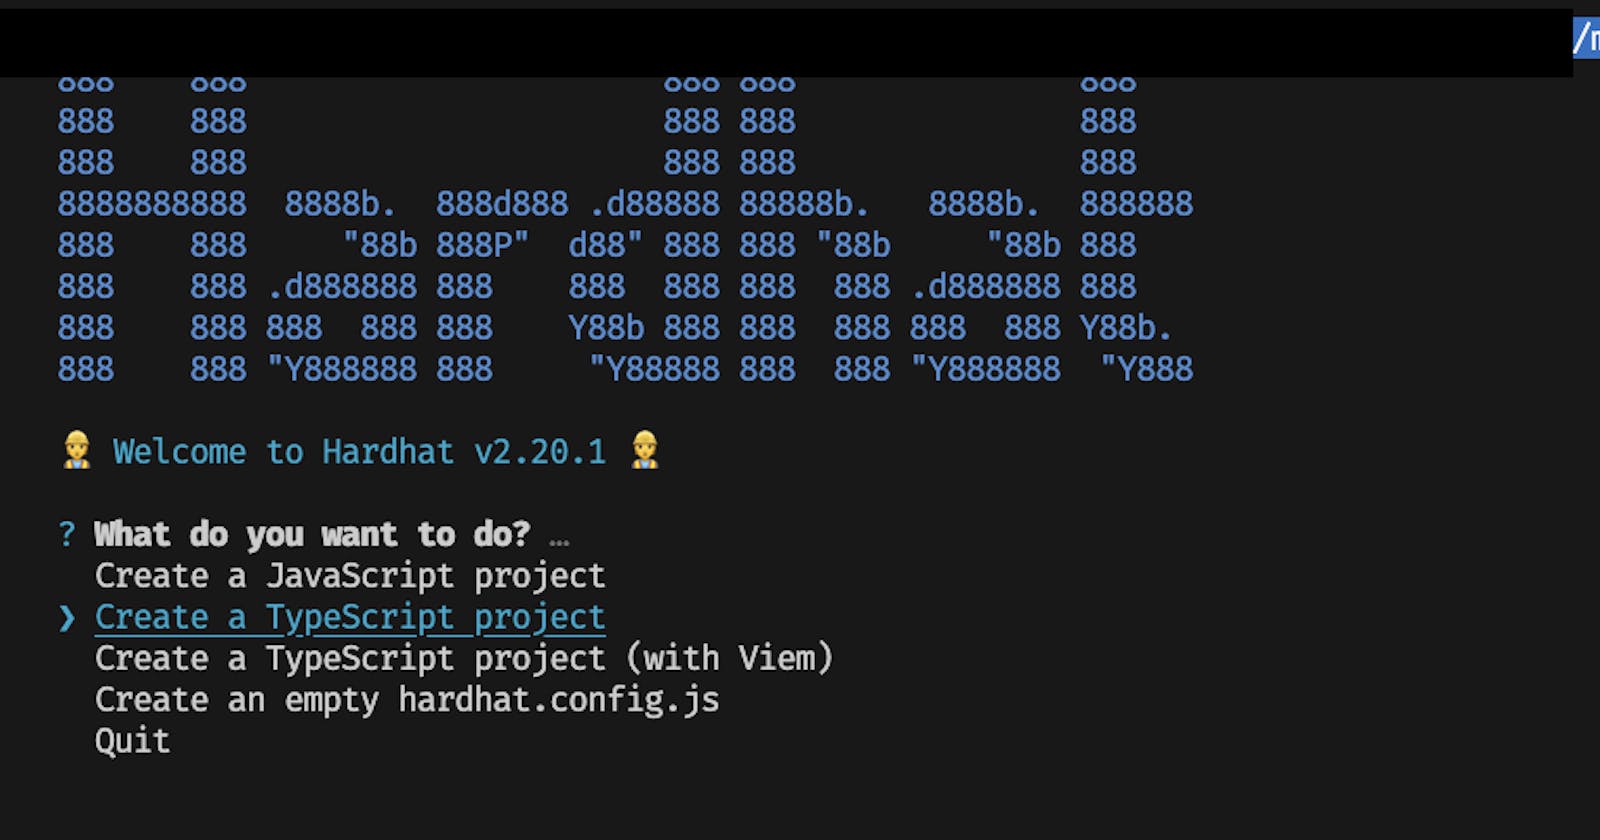
then we proceed to initialise hardhat in our directory
npx hardhat init
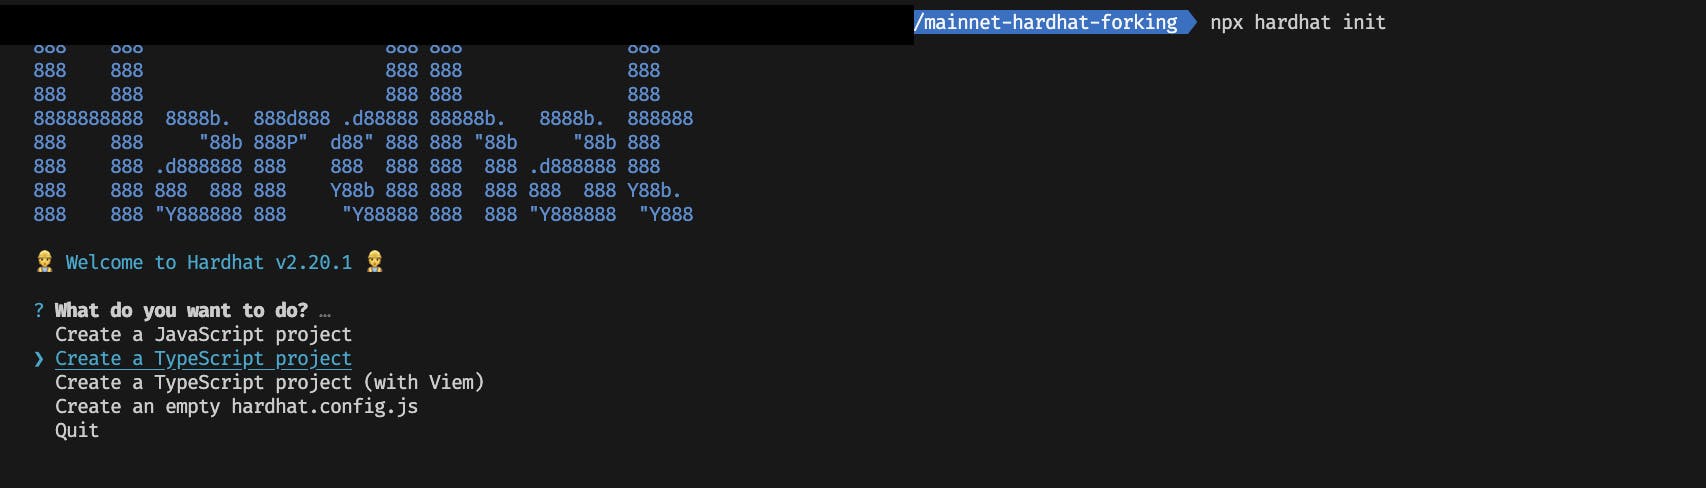
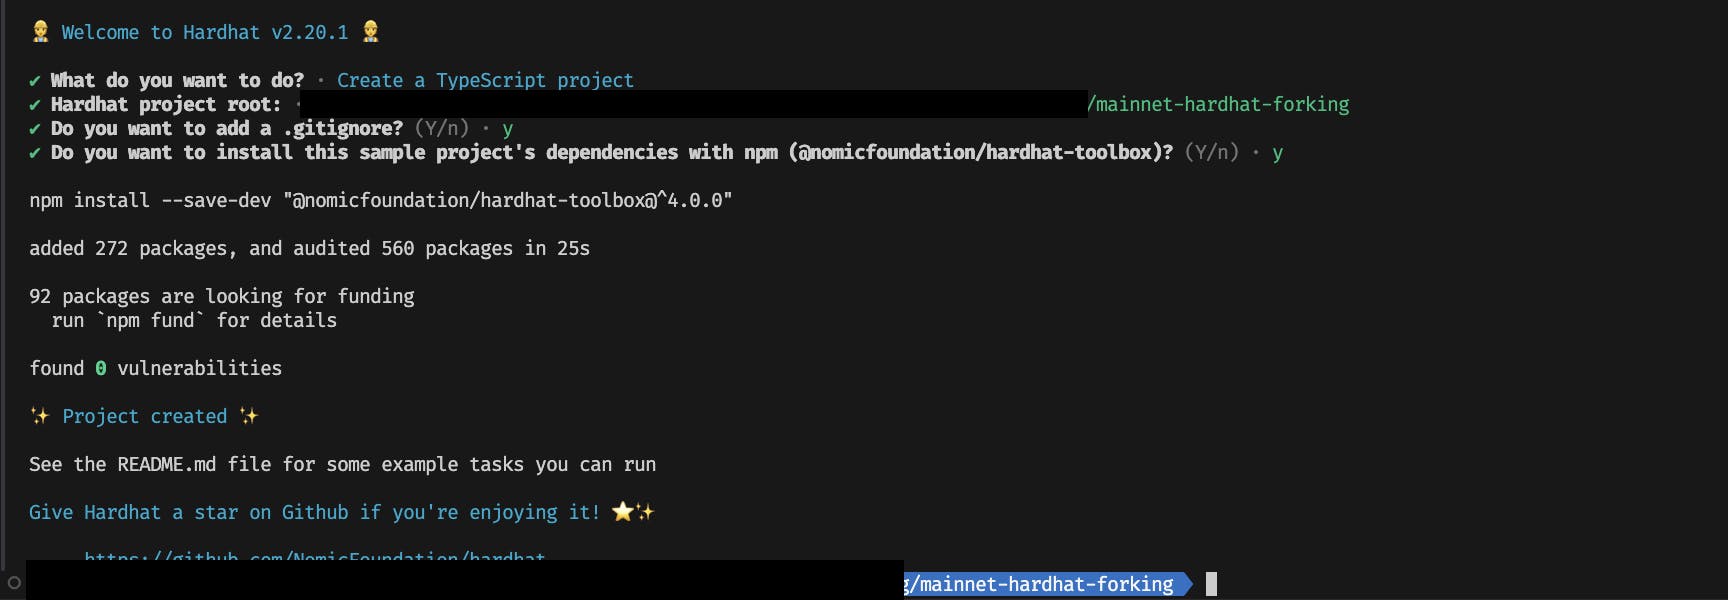
Select create a Typescript project with your keyboard and hit enter for every prompts, to create a fresh hardhat project.
When its done installing you will see an image like the one below
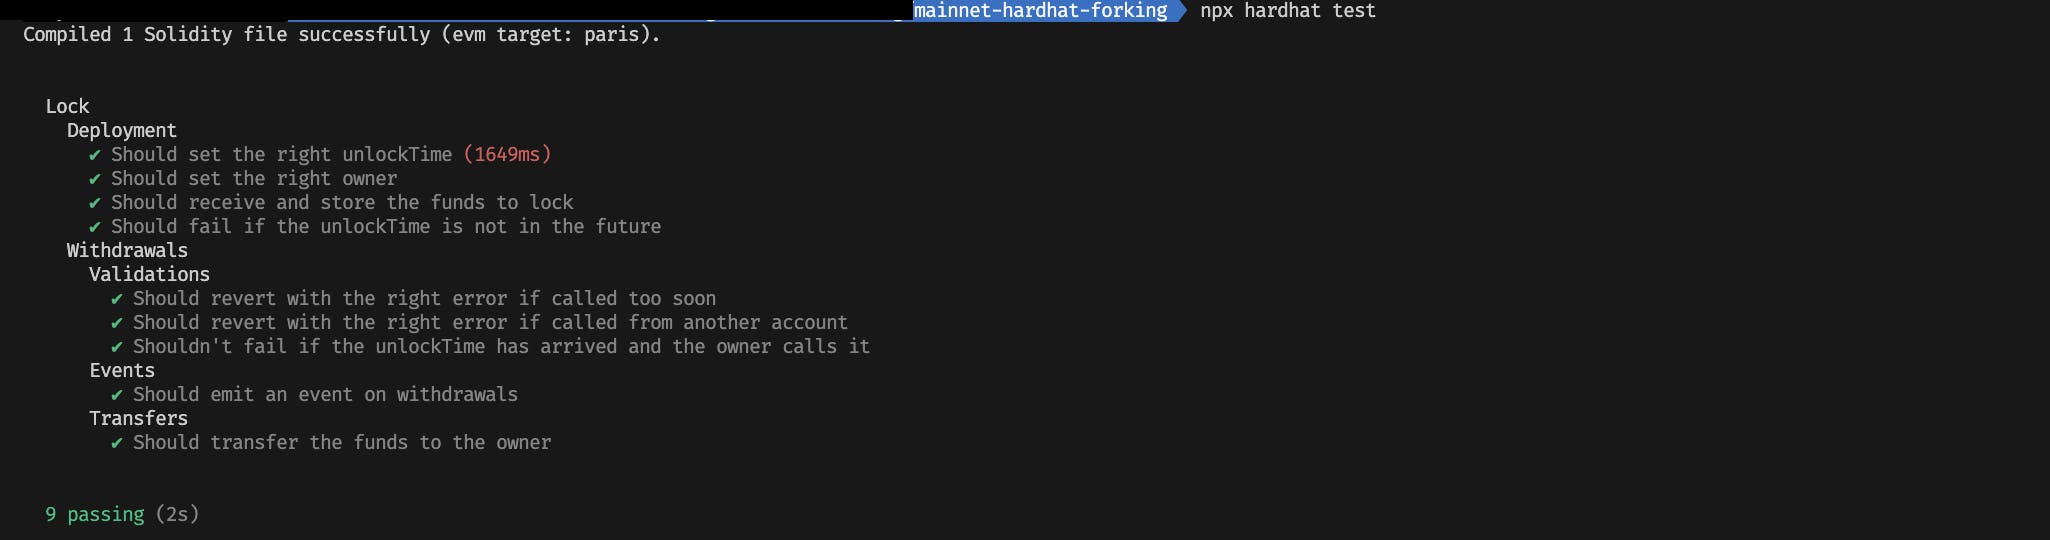
To test all your installation is correct and all working run the command below:
npx hardhat test
You should get a response like this:
Get an RPC node key, to do this its advised according to hardhat documentation to use a Full Archive node with both Infura and Alchemy provides, but i will only be talking on how to create API from Alchemy.
- Create an alchemy account: Create your free alchemy account at https://auth.alchemy.com/signup and confirm your email.
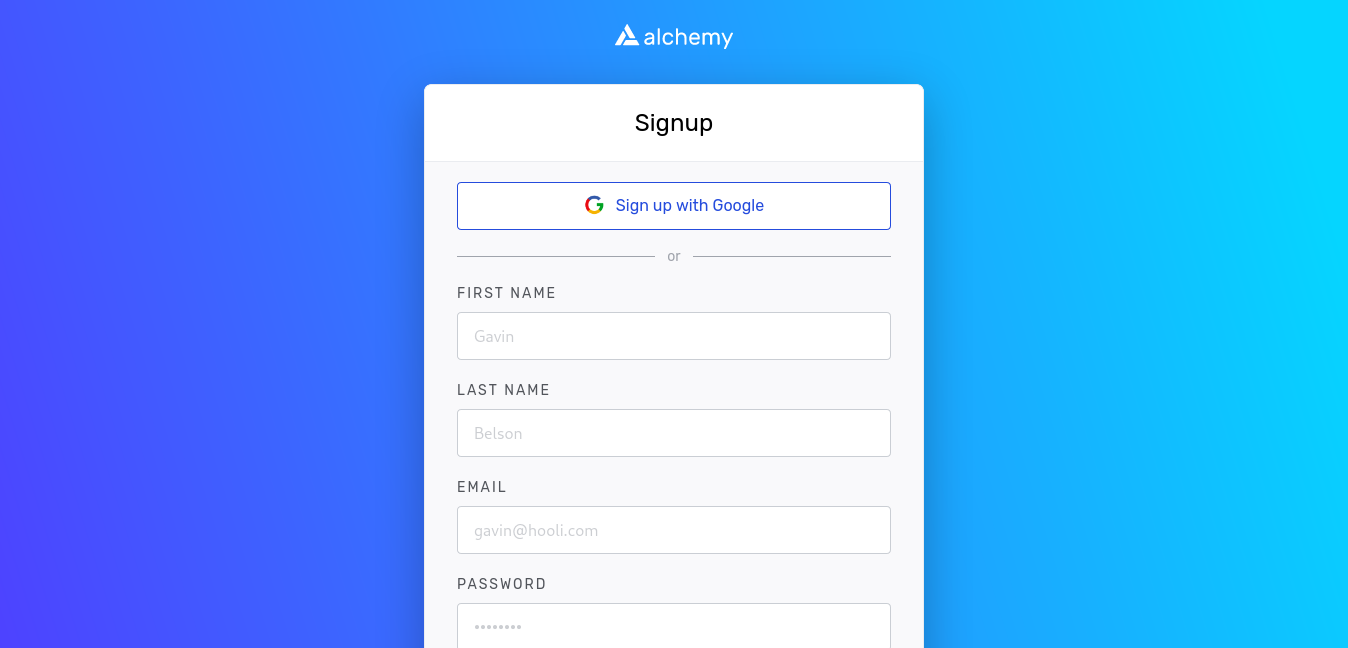
https://auth.alchemy.com/signup
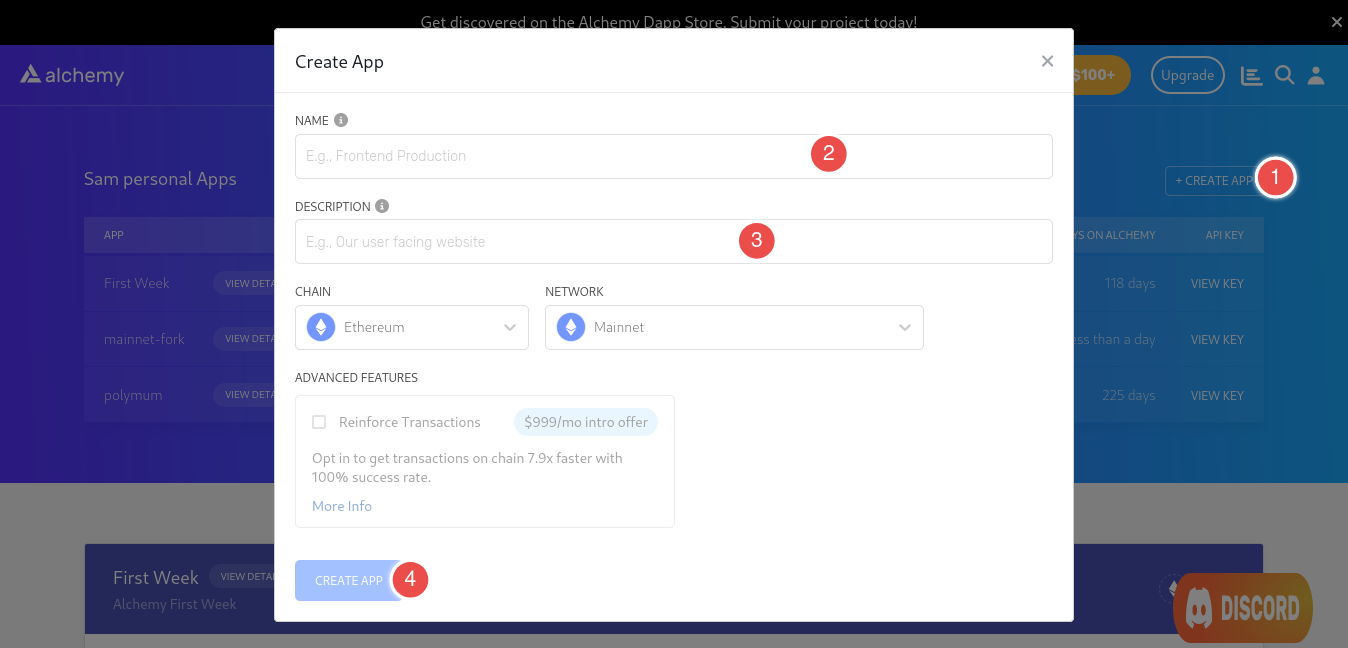
2. Create an app: In your alchemy dashboard, click on + CREATE APP button. This brings a popup to create a new app. Fill in the name and description in the form and click CREATE APP button. Example:
Name: mainnet-fork
Description: Description of what your app does so you can keep track.
Chain: Ethereum (default selection)
Network: Mainnet (default selection)
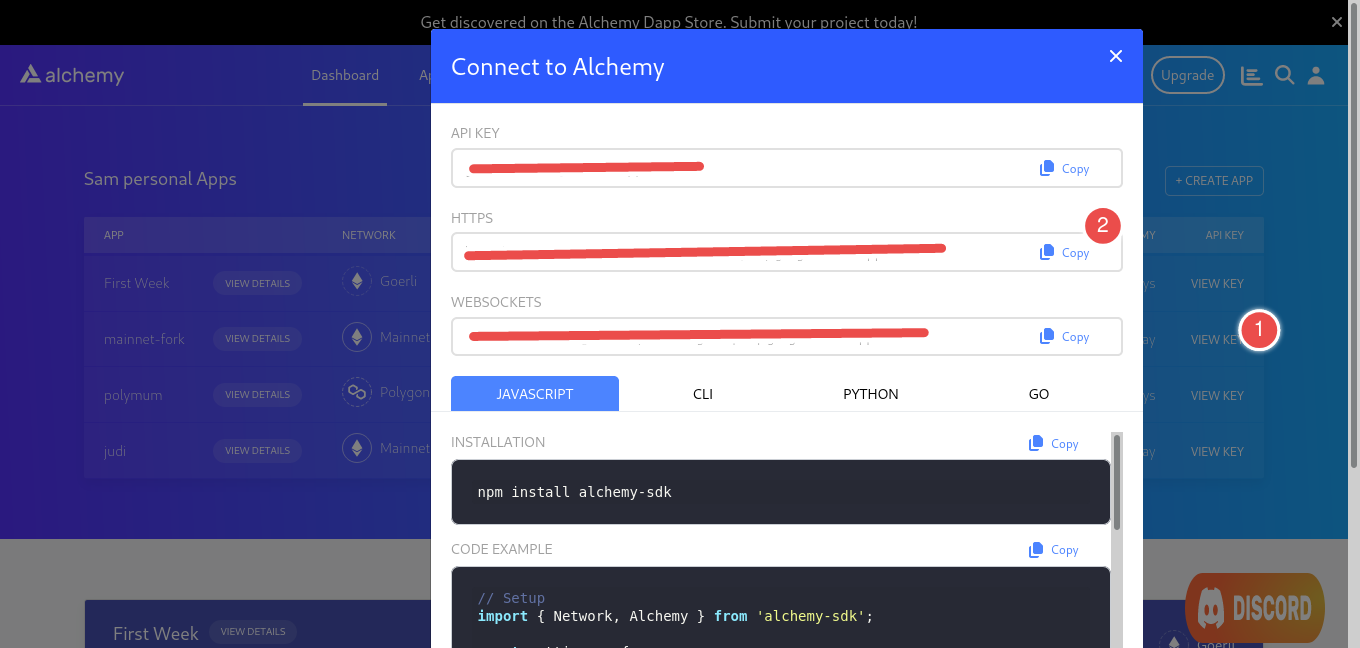
3. View key: Once your new app is created, the pop disappears. The app appeared under the Personal Apps table. Locate the newly created app in the table and click on the view key button. Copy the API KEY.
create an env file to store your credentials
touch .env
the paste the code line below in it and also copy
MAINET_ALCHEMY_API_KEY_URL="your alchemy http key here"
Modify your hardhat.config.ts file to this
import { HardhatUserConfig } from "hardhat/config";
import "@nomicfoundation/hardhat-toolbox";
import dotenv from "dotenv";

dotenv.config();

const MAINET_ALCHEMY_API_KEY_URL = process.env.MAINET_ALCHEMY_API_KEY_URL;

if (!MAINET_ALCHEMY_API_KEY_URL) {
  console.log("Please include MAINET_ALCHEMY_API_KEY_URL");
  process.exit(1);
}

const config: HardhatUserConfig = {
  solidity: "0.8.20",
  networks: {
    hardhat: {
      forking: {
        //@ts-ignore
        url: MAINET_ALCHEMY_API_KEY_URL,
        blockNumber: 19257831,
      },
    },
  },
};

export default config;
In Your terminal start your local node which would be simulating with the mainnet
npx hardhat node
To confirm that we have forked the latest block from Mainnet, you can send the following curl request into the terminal:
curl --location --request POST 'localhost:8545/' \
--header 'Content-Type: application/json' \
--data-raw '{
    "jsonrpc":"2.0",
    "method":"eth_blockNumber",
    "params":[],
    "id":83
    }'
You should then receive a response like the one below but your result will be different:
JSON
{"jsonrpc":"2.0","id":83,"result":"0xe2df84"}
The result value is the hexadecimal number of the latest Mainnet block. By using a Hex converter, you take the block number and reference it with Etherscan to validate that the timestamp is recent and you can also pick the decimal converted hex and replace in the blockNumber in your hardhat.config.ts .

Congratulations you have successfully forked mainnet with hardhat.
Now lets impersonate account and lets send some USDC from someone wallet and mainnet.
Hardhat Network allows you to impersonate any address. This lets you send transactions from that account even if you don't have access to its private key.
The easiest way to do this is with the ethers.getImpersonatedSigner method, which is added to the ethers object by the hardhat-ethers plugin:
const impersonatedSigner = await ethers.getImpersonatedSigner("0x1234567890123456789012345678901234567890");
await impersonatedSigner.sendTransaction(...);
Alternatively, you can use the impersonateAccount helper and then obtain the signer for that address:
const helpers = require("@nomicfoundation/hardhat-toolbox/network-helpers");

const address = "0x1234567890123456789012345678901234567890";
await helpers.impersonateAccount(address);
const impersonatedSigner = await ethers.getSigner(address);
delete the Lock.sol in your contract folder, Lock.ts in test folder and also deploy.ts in scripts folder.
create a new file in contract folder: IERC20.sol, because i'm interacting with ERC20 token which is USDC, i'm creating an interface for me to interact with the USDC Contract.
// SPDX-License-Identifier: UNLICENSED
pragma solidity ^0.8.9;

interface IERC20{
    function approve(address _spender, uint _value) external;
    function balanceOf(address who) external view returns(uint256 balance);
    function transfer(address recipient, uint256 amount) external returns (bool);
}
compile it to check for errors
npx hardhat compile
create a file in your scripts folder in your directory and create a file sendUsdc.ts
import { ethers } from "hardhat";
const helpers = require("@nomicfoundation/hardhat-toolbox/network-helpers");

async function sendUsdc() {
  const WHALEADDY = "0xf584f8728b874a6a5c7a8d4d387c9aae9172d621";
  const UsdcContractAddress = "0xA0b86991c6218b36c1d19D4a2e9Eb0cE3606eB48";

  await helpers.impersonateAccount(WHALEADDY);
  const impersonatedSigner = await ethers.getSigner(WHALEADDY);

  const usdcContract = await ethers.getContractAt(
    "IERC20",
    UsdcContractAddress
  );

  const [otherAccount] = await ethers.getSigners();

  console.log("Other Account Address : ", otherAccount.address);

  const amountToTransfer = ethers.parseUnits("10000", 6);

  let whaleBalance = await usdcContract.balanceOf(WHALEADDY);
  let otherBalance = await usdcContract.balanceOf(otherAccount.address);

  console.log(
    "Whale Account Balance before transaction : ",
    ethers.formatUnits(whaleBalance, 6)
  );

  console.log(
    "Other Account Balance before transaction : ",
    ethers.formatUnits(otherBalance, 6)
  );

  await usdcContract
    .connect(impersonatedSigner)
    .transfer(otherAccount.address, amountToTransfer);

  whaleBalance = await usdcContract.balanceOf(WHALEADDY);
  otherBalance = await usdcContract.balanceOf(otherAccount.address);

  console.log(
    "Whale Account Balance after transaction  : ",
    ethers.formatUnits(whaleBalance, 6)
  );

  console.log(
    "Other Account Balance before transaction : ",
    ethers.formatUnits(otherBalance, 6)
  );
}

sendUsdc()
  .then(() => process.exit(0))
  .catch((error) => {
    console.error(error);
    process.exit(1);
  });
Dont forget your local node is still on, then run the following command to run the script above
npx hardhat run scripts/sendUsdc.ts
You will get the following output in your terminal.
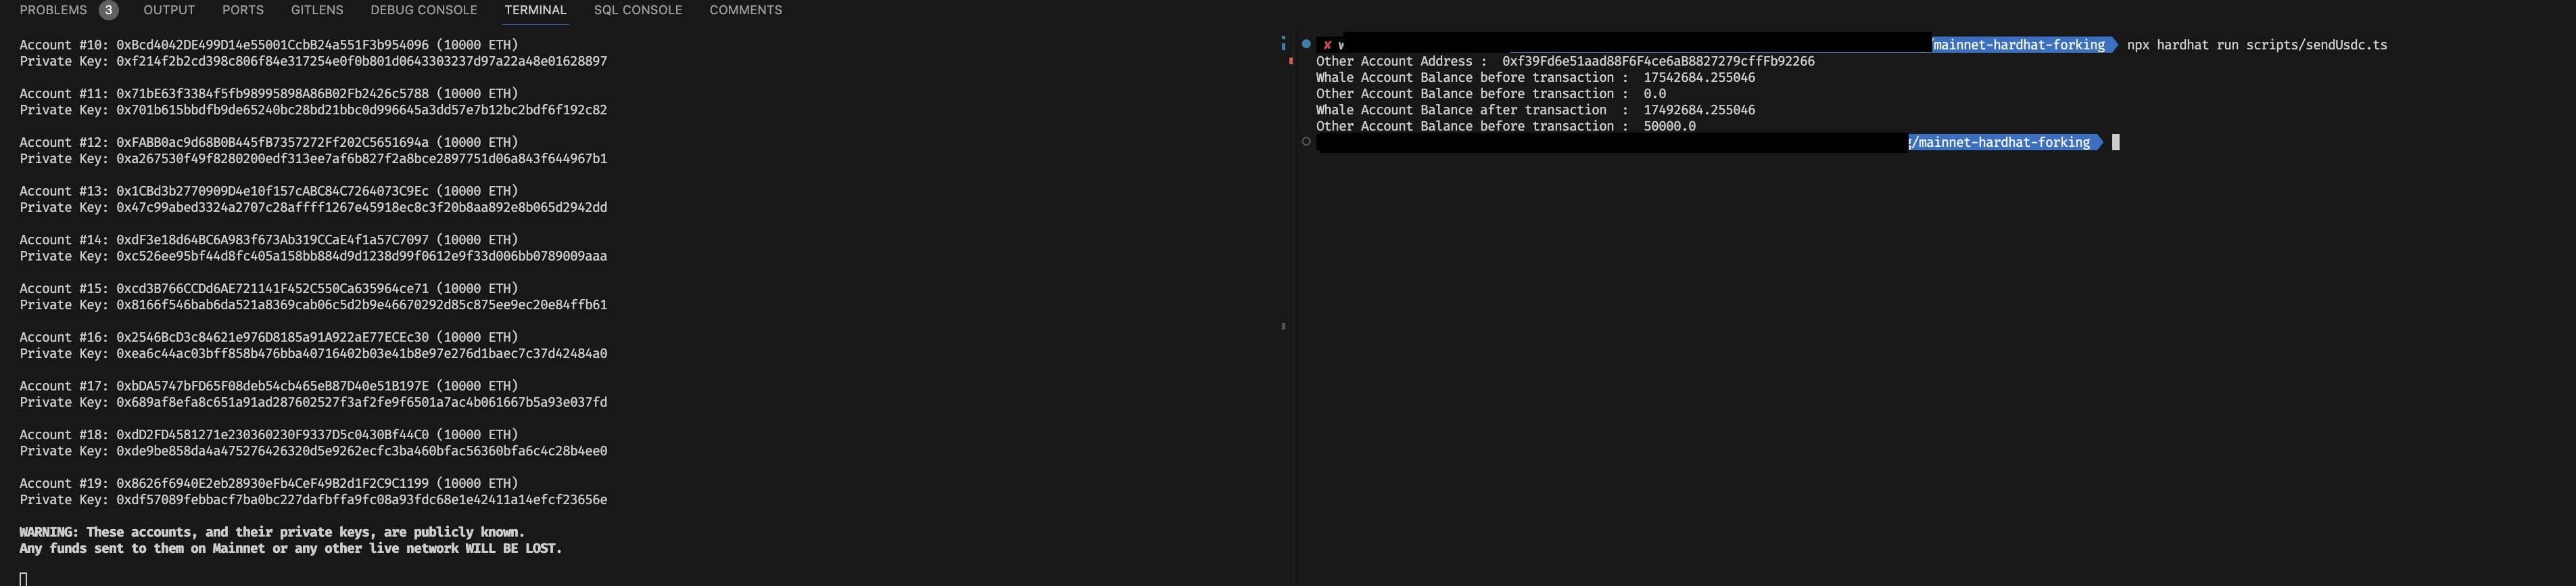
Other Account Address : 0xf39Fd6e51aad88F6F4ce6aB8827279cffFb92266
Whale Account Balance before transaction : 17542684.255046
Other Account Balance before transaction : 0.0
Whale Account Balance after transaction : 17492684.255046
Other Account Balance before transaction : 50000.0
With aid of Hardhat forking you have created a local replica of a real blockchain, like Ethereum's mainnet. This replica, entirely separate from the actual network which can be used test your contracts in a safe environment, eliminating the associated costs of deploying on the actual mainnet and also leverage historical data and test wallets to gain valuable insights into how your contract or dApp will function on the mainnet.
This approach provides a controlled and efficient way to test and refine your smart contracts before deploying them on the actual mainnet.
Here is the github repo
I'll be publishing more articles soon on interacting with UNISWAP V2 different Swap functions, make sure to check back.
Big Shout out to WEB3BRIDGE for the work they do in onboarding web3 developers.
Resources:
https://github.com/Oluwatobilobaoke/hardhat-mainnet-forking
https://hardhat.org/hardhat-runner/docs/getting-started#quick-start
https://docs.alchemy.com/docs/how-to-fork-ethereum-mainnet
https://www.youtube.com/watch?v=mp758KKrCgc&list=PLXiAtWDhSlIsZi_H6CjdOt5l863P_E1NJ&index=11
https://medium.com/coinmonks/impersonating-accounts-with-hardhat-21212c94dcec